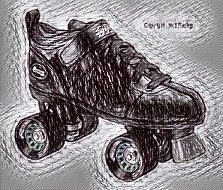
Chicago Skates are popular roller skates known for their classic design and durability.
Proper lacing is an essential part of using roller skates, as it helps to keep the skates securely on your feet and provides the necessary support for your ankles.
Here's a step-by-step guide on how to lace your Chicago Skates:
Step 1: Loosen the Laces
Before you begin, loosen the laces on your Chicago Skates.
This will help you to get a better fit and allow you to adjust the tension as you lace up.
Step 2: Start at the Bottom
Begin lacing your Chicago Skates at the bottom of the skate, near the toe.
Thread the lace through the bottom eyelet and pull the ends of the lace until they are even.
Step 3: Crisscross the Laces
Next, cross the ends of the lace over each other, then thread them through the next set of eyelets, moving up towards the ankle.
Be sure to keep the tension even on both sides of the skate.
Step 4: Continue Lacing
Continue crisscrossing the laces up the skate, threading them through each set of eyelets.
Make sure to keep the tension even on both sides of the skate as you go.
Step 5: Tie the Laces
Once you have laced up to the top of the skate, tie the laces in a bow or knot at the ankle.
Be sure to tie the laces snugly enough to keep your foot in place, but not so tight that it cuts off circulation or causes discomfort.
Step 6: Adjust the Fit
Finally, adjust the fit of your Chicago Skates by tightening or loosening the laces as needed.
You may also want to adjust the position of the tongue and the tightness of the ankle strap to ensure a comfortable and secure fit.